
Natural Face Masks at Home A Complete Guide to Glowing Skin
Introduction
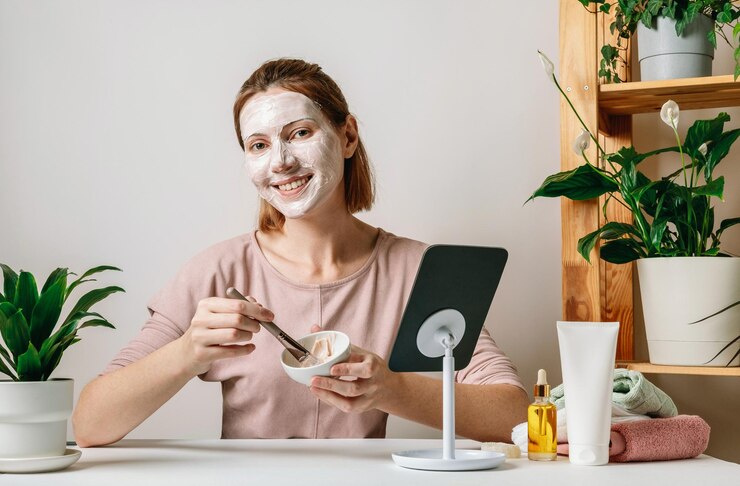
There is something deeply comforting about caring for your skin with ingredients you can find in your kitchenIn a world filled with chemically loaded skincare products natural face masks offer a gentle, effective and affordable way to nourish your skin.Natural Face Masks at Home A Complete Guide to Glowing Skin. These masks are not only free from harsh additives but also allow you to personalize your skincare based on your needs whether it’s dryness, acne dullness or sensitivity.
This guide explores the best natural face masks you can make at home, categorized by skin type and concern.With simple recipes, application tips and usage advice you wiil discover how to turn your kitchen into your personal spa no fancy products or expensive treatments needed.
Choose Natural Face Masks
Before we dive into the recipes, let’s understand why natural masks are worth your time:
- Free from chemicals and synthetic fragrances
- Budget-friendly and sustainable
- Customizable to skin needs
- Freshly made with real ingredients
- Support skin healing, nourishment, and glow
Natural ingredients often carry multiple benefits. For example honey hydrates, fights bacteria and soothes inflammationall in one!
Know Your Skin Type First
Understanding your skin type is the first step to choosing the right face mask. Here’s a quick guide:
- Oily skin: Prone to excess sebum, shine, and clogged pores
- Dry skin: Feels tight, rough, or flaky
- Combination skin: Oily in the T-zone, dry on the cheeks
- Sensitive skin: Reacts easily to new products or weather changes
- Normal skin: Balanced, clear, and not reactive
Homemade Face Masks for Oily Skin
Oily skin needs masks that balance oil without stripping the skin’s natural moisture. Look for ingredients with antibacterial, astringent, or oil-absorbing properties.
Multani Mitti (Fuller’s Earth) and Rose Water Mask
- 2 tablespoons of Multani Mitti
- 3 tablespoons of rose water
How to Use
Mix into a smooth paste and apply to a clean face.Let it dry for 15 minutes.Rinse with lukewarm water.
Benefits:
Controls oil, tightens pores and cools the skin.
Tomato and Honey Mask
- 1 small ripe tomato (pulped)
- 1 teaspoon of honey
How to Use
Apply the mixture to your face and leave it on for 15 to 20 minutes.Wash off with cool water.
Benefits Tomatoes help reduce oil and acne; honey soothes inflammation.
Homemade Face Masks for Dry Skin
Dry skin need moisture boosting mask with natural oils and the soothing ingredients.
Avocado and the Olive Oil Mask
- ½ ripe avocado
- 1 teaspoon of olive oil
How to Use
Mash and blend into a smooth paste.Apply to your face and leave on for 20 minutes.Rinse with warm water.
Benefits
Deep hydration and nourishment of skin.
Banana and Yogurt Mask
- ½ ripe banana
- 2 tablespoons of plain yogurt
- 1 teaspoon of honey
Methods of Use
Combine and use.Rinse after leaving on for 15 to 20 minutes.
Benefits
soothes irritated skin and replenishes hydration.
Homemade Face Masks for Combination Skin
Combination skin requires a balance between moisturizing dry areas and eliminating excess oil, which is why homemade face masks are ideal.
Oatmeal and Honey Mask
- 2 tablespoons of ground oats
- 1 tablespoon of honey
- A little warm water
How to Use
Mix into a thick paste and apply.Leave for 15 minutes before rinsing.
Benefits
Gently exfoliates, hydrates and balances.
Papaya and Cucumber Mask
- 3 to 4 cubes of ripe papaya
- 2 slices of cucumber grated
How to Use
Mash both into a pulp and apply for 20 minutes. Rinse with cool water.
Benefits
Brightens and calms mixed skin areas.
Homemade Face Masks for Sensitive Skin
Sensitive skin needs extra care.Stick to calming non acidic and fragrance free ingredients.
Aloe Vera and Cucumber Gel Mask
- 2 tablespoons of aloe vera gel
- 1 tablespoon of cucumber juice
How to Use
Refrigerate for 10 minutes after thoroughly mixing. Spend fifteen minutes applying. Rinse gently.
Benefits
Reduces redness hydrates and soothes.
Chamomile Tea and Oat Mask
- 2 tablespoons of brewed (cooled) chamomile tea
- 1 tablespoon of ground oats
- 1 teaspoon of honey
How to Use:
Combine and apply for 15 to 20 minutes.Rinse with lukewarm water.
Benefits:
Calms irritation and strengthens skin barrier.
DIY Face Masks for Skin That Is Dull
Choose masks containing enzymes, vitamins, and antioxidants if your skin isn’t glowing.
Turmeric and Yogurt Mask
- 1 teaspoon turmeric powder
- 2 tablespoons plain yogurt
- 1 teaspoon honey
How to Use:
Mix and apply for 15 minutes. Rinse thoroughly (may stain slightly).
Benefits:
Brightens, clears, and boosts skin tone.
Orange Peel Powder and Milk Mask
- 1 tablespoon orange peel powder
- 2 tablespoons of milk
How to Use
Apply and leave for 15 minutes. Wash off with cool water.
Benefits
Gives a natural glow and fades pigmentation.
Face Masks to Prevent Aging
These masks improve collagen and tighten the face while reducing fine wrinkles.
Lemon Mask with Egg White
- One white egg
- Several teaspoons of lemon juice
How to Use
Whisk together and apply.Once dry rinse with lukewarm water.
Benefits
Tightens and smoothens skin.
Green Tea and Honey Mask
- 2 tablespoons brewed green tea (cooled)
- 1 teaspoon honey
How to Use
Apply and leave for 15 to 20 minutes. Wash off gently.
Benefits
Fights free radicals and firms the skin.
Face Masks for Acne Prone Skin
For breakouts go for masks with antibacterial and soothing properties.
Neem and Tulsi (Basil) Mask
- 1 tablespoon neem powder
- 1 tablespoon tulsi powder
- Rose water to mix
How to Use
Make a paste and apply for 15 minutes. Rinse with cool water.
Benefits
Kills acne bacteria and reduces inflammation.
Cinnamon and Honey Mask
- 1 teaspoon cinnamon powder
- 1 tablespoon honey
How to Use
Apply to acne-prone areas for 10 minutes. Rinse well.
Note: Always do a patch test as cinnamon can be strong.
Tips for Best Results
Always apply on a clean face
Use a brush or clean fingers
Avoid metal bowls with acidic ingredients
Patch test if you’re trying something new
Don’t leave masks on for too long
Use 1–2 times a week, unless noted otherwise
Moisturize afterward
Keep masks refrigerated for freshness
Use fresh ingredients—don’t store for too long
Use Face Masks
- Morning Use brightening and hydrating masks.
- Evening Detoxifying or anti-aging masks work well.
- Before events Go for glow-boosting options like turmeric or fruit-based masks.
- After sun exposure Use calming masks with aloe vera or cucumber.
Common Mistakes to Avoid
- Using raw lemon directly on skin (can irritate and cause photosensitivity)
- Over-masking (more than 3x a week can lead to dryness)
- Ignoring your skin type
- Not cleaning your hands/tools
- Leaving the mask on too long (can dehydrate or irritate skin)
Conclusion
Natural face masks are more than just skincare they’re a soothing ritual, a moment of self care, and a gentle way to give your skin what it needs without harsh chemicals. Whether you’re battling oily patches dry flakes, breakouts or just looking for a healthy glow there’s a homemade remedy that’s just right for you.
The best part? You don’t have to spend a fortune.With a few basic kitchen ingredients think honey, oats, yogurt, aloe vera you can create spa worthy treatments at home.These masks nourish your skin naturally and also help you stay mindful of what you’re applying to your face.
Just remember results come with consistency.It might take a few weeks of regular use to see visible changes, but your skin will thank you for the effort.Always consider your skin type, do patch tests when trying new ingredients and listen to your skins response.
In the end, glowing skin isn’t about perfection it’s about care nourishment and choosing what’s right for you.With a few natural ingredients and a little time, you can glow from the inside out.